
Install a Shaker Peg Rail

I learned to love peg rails the same way I learned to love lidded bins and over-the-door hooks: after tripping over one too many “temporary” piles. In my tiniest studio apartment, the floor was either clear or it was chaos. A Shaker-style peg rail is one of those old-school farmhouse ideas that still solves modern problems, because it turns wasted wall space into hard-working storage.
This is the step-by-step method I use to “wrap” a room in peg rails so coats, bags, even extra dining chairs can live off the ground. You do not need to be an interior designer. You just need a plan, a level, and a little patience.
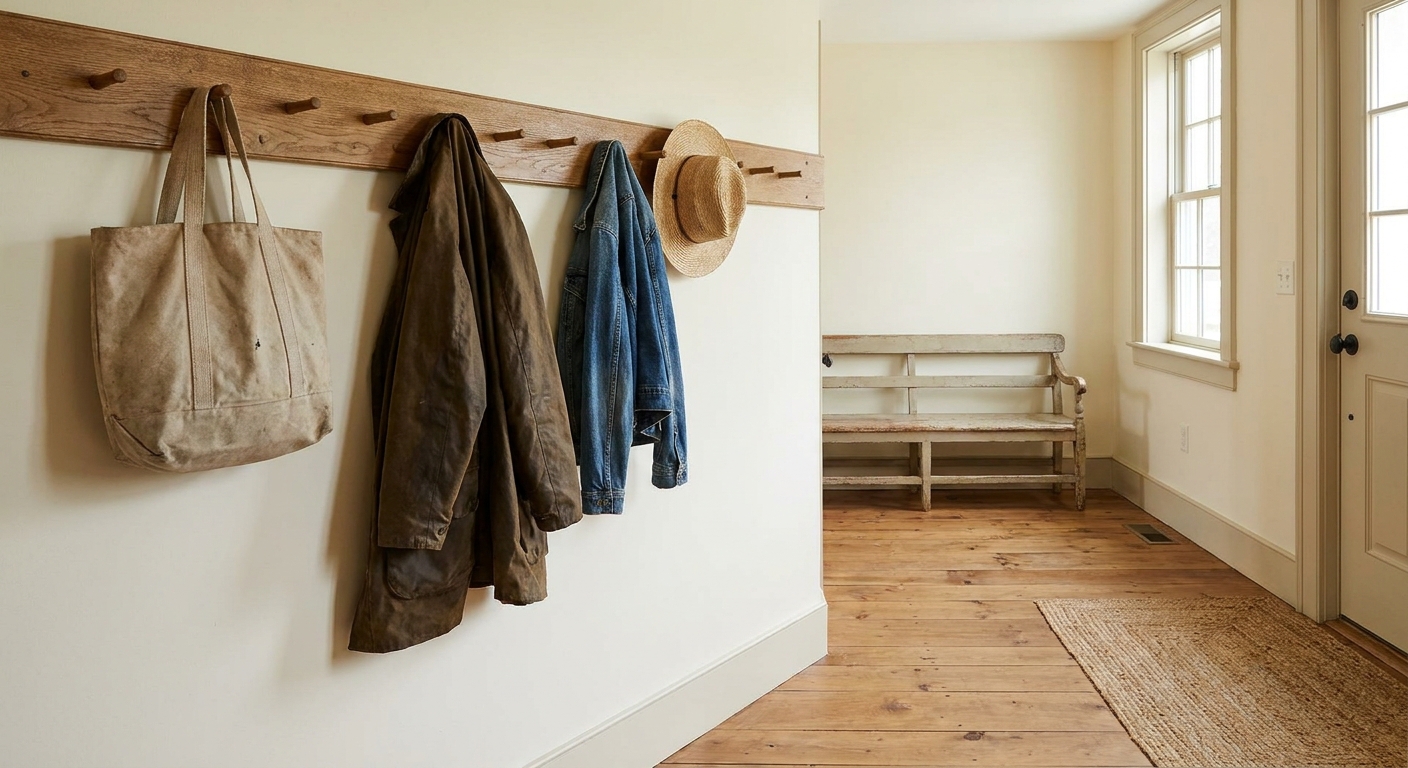
Why peg rails clear the floor
A well-placed rail does three things at once:
- It creates a consistent landing spot for everyday items so they do not drift onto chairs, benches, or the floor.
- It uses the wall band that gets ignored between typical hook height and higher up the wall. In small spaces, that “extra” strip of wall can do a lot of work.
- It scales from one wall to a full-room wrap, which is ideal if you have more stuff than closets.
If you are already building a drop zone, pair this with the simple zones in Plan a Small Entryway Drop Zone so the rail is supporting an actual routine, not just becoming another place to hang clutter.
Where peg rails work best
Best locations
- Entryway or mudroom wall: coats, backpacks, dog leash, umbrellas.
- Dining room: a place to park lightweight chairs off the floor for cleaning, if your rail system is built and fastened for that load.
- Kitchen side wall: aprons, market bags, a small step stool.
- Bedroom: tomorrow’s outfit, robe, handbags.
- Hallway wrap: a continuous “drop anywhere” option for busy households.
What to hang safely
- Coats and jackets (one peg per coat, not stacked like a closet rod).
- Bags and backpacks (rotate so one peg does not take all the weight).
- Light decor like wreaths and baskets.
A quick safety reality check: coats and bags are one thing. Chairs and other heavy or awkward items create leverage that can stress pegs, joints, and fasteners. For anything heavy or “torque-y,” follow the manufacturer’s load rating if you bought a rail, fasten into studs or solid blocking, and test with one item before you commit to a whole wall of it.
Choose the right rail
Traditional Shaker peg rails are simple by design: a board with evenly spaced wooden pegs. For farmhouse storage, I look for three features:
- Thick enough board to stay straight (a 3/4 inch board is a common, sturdy choice).
- Pegs that resist slipping (a shoulder or a gentle curve helps keep straps from sliding off).
- Consistent peg spacing so it looks intentional when it wraps around a room.
One more thing I pay attention to, especially if the rail will get daily use: how the pegs are installed. A screwed-in or well-anchored peg tends to hold up better than a loose dowel-and-glue situation, and hardwood pegs typically take wear better than softwood.
If you love the farmhouse vibe and want the whole look to feel cohesive, start with our farmhouse style guide so you can match wood tones and finishes to your home instead of guessing as you go.
Tools and materials
- Peg rail boards (store-bought or DIY) and matching pegs
- Stud finder
- Tape measure and pencil
- Level (longer is easier for long runs)
- Drill and bits (including a bit for pilot holes)
- Screws sized for your wall and rail thickness
- Wood filler, sandpaper, and paint or stain if finishing
- Miter saw or hand saw and miter box for clean corners
- Optional: construction adhesive (extra help, not structural support)
Tip from my “two kids and a dog” season of life: pre-finish the rails before you install them. Painting around pegs and tight wall corners is the kind of task that mysteriously takes three naps and a lost sock.
About adhesive: it can help reduce tiny gaps on slightly wavy walls, but it makes removal messier later and it is not a substitute for screws into solid framing.
Plan height and layout
Pick a height that gets used
There is no single perfect height, but these are common ranges that work in real homes. Adjust for your ceiling height, door and window trim, and the people who will actually use the rail.
- Adult rail: often around 60 to 66 inches from the floor to the top of the board.
- Kid-accessible rail: a second rail around 42 to 48 inches high can help kids hang up their own stuff.
- Chair storage: higher is often better so chair legs do not knock the baseboard. Test one chair with a temporary hook first.
My rule: stand where you will use it, pretend you are coming home with a bag and a coat, and place the rail where your hand naturally reaches without thinking.
Map the studs first
Use a stud finder and mark stud centers lightly in pencil along the whole run. This is the boring step that prevents the “why is this rail sagging?” moment later.
Decide how to handle corners
If you are wrapping a room, corners matter. You have three common approaches:
- Butt joint: one rail ends into the next. Easiest, looks clean when caulked and painted.
- Miter joint: both rails cut at 45 degrees for a picture-frame corner. Looks more seamless, takes more precision.
- Corner block: a small square block at the corner with rails butting into it. Forgiving and charming in farmhouse spaces.
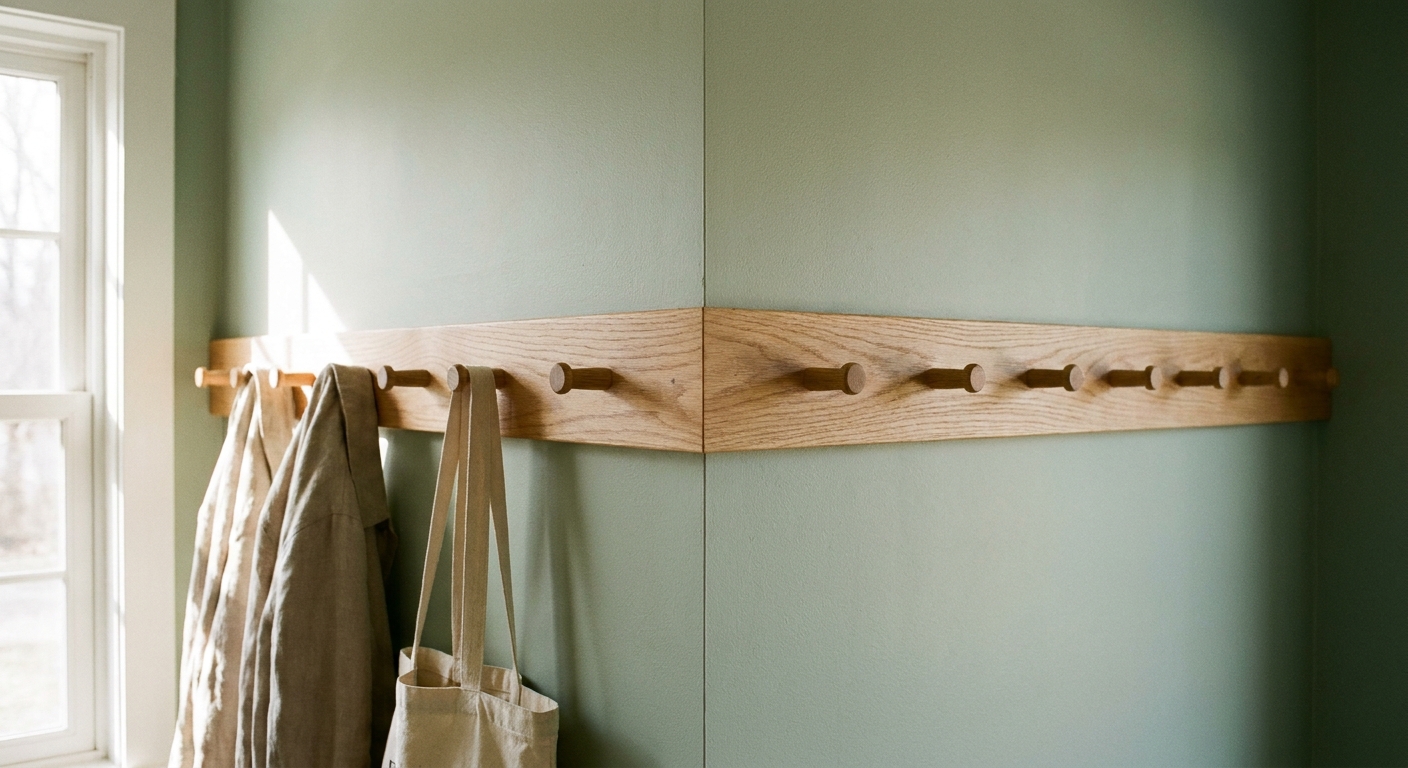
Install one rail
- Cut to length. Measure wall length and cut the rail board. Dry-fit it against the wall.
- Mark a level line. Use a level to draw a light guideline where the top edge of the rail will sit.
- Pre-drill mounting holes. Hold the rail in place, transfer stud marks onto the rail, then drill pilot holes through the board where the studs are. Some rail designs let you hide screws by placing fasteners where pegs will cover them, or by drilling through specific peg locations so the peg conceals the screw head later.
- Mount into studs when you can. Drive screws through the pilot holes into studs. Check for level as you go.
- Choose screw length for real bite. As a starting point, many installs land in the 2 1/2 inch to 3 inch range, but the better rule is this: pick a screw long enough to go through the rail and wall surface and still sink about 1 1/4 inches into solid framing.
- Add pegs (if separate). Some rails have pegs already installed. If yours are separate, install them according to the rail design, then wipe any glue squeeze-out immediately.
- Fill and finish. Wood-fill visible screw holes, sand smooth when dry, then paint or touch up.
If you only hit one or two studs in a short run: use high-quality anchors for the remaining points and keep heavier items directly over studs whenever possible. For plaster, older walls, or anything that feels questionable, it is worth slowing down, doing a test hole, or calling in a pro. Repairs are not the kind of farmhouse charm I am chasing.
Wrap the room cleanly
Wrapping the room looks dramatic in the best way, but the trick is consistency. I like to treat the entire room like one continuous line.
1) Make one master level line
Pick your final height and mark it on every wall before you attach anything. Use a level and take your time. This prevents the common issue where each wall is “level-ish” but the corners do not meet nicely.
2) Install the longest wall first
Get one long, straight run perfect. Everything else can be fit to it.
3) Dry-fit corners
For a miter joint, cut slightly long, test fit, then sneak up on the final cut. For a butt joint, square cuts matter. If your walls are not perfectly square (many are not), a corner block is the most forgiving option.
4) Keep peg spacing consistent
If your rails have pre-set spacing, plan cuts so you do not end up with two pegs awkwardly close together at a corner. When I am unsure, I lay the rails on the floor in order and mark where seams will fall, then adjust cut points before anything goes on the wall.
Hanging chairs safely
Hanging chairs is a farmhouse classic and it is genuinely practical for cleaning and for small dining areas. It is also where I want you to be the most cautious, because chairs put leverage on the pegs and rail.
Before you hang a chair
- Check the rail system. If your rail is store-bought, follow the manufacturer’s instructions and load ratings. If it is DIY, be honest about the materials and joinery.
- Assume leverage is the problem. A chair might not feel heavy in your hands, but the way it pulls away from the wall can increase stress on the pegs and fasteners.
- Use studs or blocking only. For chairs, I do not rely on drywall anchors alone. If you cannot hit studs where you need them, consider adding blocking or skipping chair storage.
Chair checklist
- Choose the right chair. Lightweight chairs with a strong top rail are easiest. Avoid anything wobbly or already loose.
- Hang where you are solidly fastened. Put chair-hanging pegs where the rail is secured into studs or blocking.
- Use two pegs per chair when possible. Two pegs reduce torque and help prevent twisting.
- Test one chair first. Hang a single chair for a few days. If anything shifts, creaks, or loosens, stop and reinforce before you scale up.
- Add felt bumpers. Stick small felt pads where chair legs touch the wall to prevent scuffs.
If your dining area is tight, you may also like the floor-saving ideas in 10 Stylish Coffee Table Alternatives With Hidden Storage. The same “get it off the floor” mindset applies beautifully in multipurpose rooms.
Farmhouse finish options
- Painted to match trim: classic, quiet, and makes the rail look original to the house.
- Natural wood + clear coat: warmer and a little more rustic, great with white walls.
- Stained to match floors: cohesive, but test stain first because undertones can surprise you.
My personal favorite in busy family spaces is a durable painted finish, because it touches up easily after inevitable backpack scuffs.
Common problems
The rail is not level
Back out the screws before the holes get chewed up, re-level, then re-drive. If your wall bows, you may need a thin shim behind the rail at one stud.
It feels loose when I pull on it
That usually means you missed a stud, the screw is too short, or you do not have enough bite into solid framing. Recheck stud locations, add attachment points, and upgrade screw length as needed.
Pegs keep slipping items off
Try hanging by loops instead of wide straps, or add a small S-hook. For coats, one coat per peg makes a big difference. Overstacking is what creates the slide.
The rail looks too busy
This is an emotional clutter trap I fall into myself. Pick zones on the rail: daily essentials on the left, occasional items on the right. Store extras elsewhere so the rail stays calm.
Make it a system
A peg rail is at its best when it supports one simple habit: come in, hang it up, clear the floor. If you need a little extra help keeping surfaces from becoming storage, you will probably enjoy Beautiful Kitchen Countertop Organization, because the logic is the same. Give items a home that is easy to use, and you stop fighting your space every day.
Progress beats perfection. A peg rail that gets used is better than a perfectly styled wall that turns into a laundry chair by week two.
Quick FAQ
Do I have to install the rail into studs?
For light decor, sturdy wall anchors can work. For daily coats and bags, studs are best. For chairs or anything heavy, I strongly prefer studs or solid blocking, and I follow any manufacturer guidance for the specific rail.
Can I install peg rail over plaster walls?
Yes, but take it slow with drilling and use the right anchors or screws for your wall type. If your walls are older and crumbly, do a small test hole in an inconspicuous spot first. If you cannot confidently find solid framing, consider professional help, especially for heavy-use rails.
How long should a peg rail run be?
As long as you will actually use it. In tight homes, even a 24 to 36 inch section can change your day. Wrapping a room is wonderful for busy families, but start with the wall that causes the most daily mess.